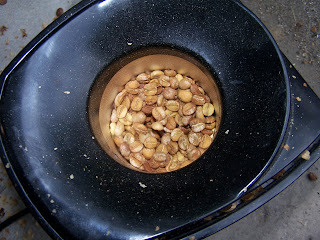
Home roasting is cheap and can be very rewarding, both in quality and experience gained. I roasted a pound of Brazilian coffee this morning for a family friend. She was the owner of the first coffee shop I ever worked for- where the specialty coffee bug bit me: The Coffee Ground. Anyway, I took a few pictures of the roasting process with my wife's camera, so my explanation of the process could be better understood. I have explained the ins and outs of the roasting process in depth before, so I won't go into it in excessive depth here. Enjoy the pictures!
The supplies I used: obviously the green coffee beans, a couple of colanders, 1/2 cup scoop, scales, a container for completed beans, and my cell phone as a timer.
Here's a close-up of the beans I used, with all the information on the label. I highly recommend Sweet Maria's for your home-roasting needs.
The typical amount used at a time reflects the prescribed amount of popcorn kernels for the particular popper: 1/2 cup at a time. For Latin coffees and some Africans as well, I add a bit extra to help slow down the roasting process, allowing for the very dense beans to be roasted thoroughly (not an issue with the less dense Indonesian beans).
And dumping the beans in all at once, to the pre-heated popper:
I am roasting in my garage with the door up due to the excessive amounts of chaff that is expelled when roasting more than 1 cup of beans at a time. It's much easier to simply sweep out the garage when finished than it is to clean out the entire kitchen, plus reinstall the over-sensitive smoke detector that would inevitably be set off.
Here's a shot of the beans as they are from 0 to about 45 seconds of roast time. This period of "yellowing" runs fairly quickly for some bean varietals, but this is much slower than normal:
After about 1"30sec., the beans begin to tan. After about double this time, the beans will be roasted enough to be drinkable, but that roast is not always desirable (if ever).
Here are the beans at 3". This is very close to the "first crack" period, the beginning of carmelization of the sugars in the beans. They are drinkable here, but definitely not optimum for this varietal. You can see some chaff still attached to the bean, this is the "silverskin" that encases the seed of the coffee plant. As roasting goes on, most of the chaff is blown out of the roaster leaving the exposed bean. A little chaff always remains inside the bean itself.
At 4" almost all beans have reached at even browning. This is where most of my African varietals will be stopped, about halfway between first and second crack. This Brazilian, however, needs a bit more time to fully develop its natural sugars in carmelization.
It's important to note that the way these pictures look is not how it is seen by the naked eye. This picture shows what the beans, whirling around in the popper actually look like. This more blurred look makes the roasting process much more difficult to judge. Professional roasters have "dip sticks" that they insert into their larger drum roasters that extract a sample of the coffee- this allows them to get a great view of the beans' development, unlike me.
At 6"45sec., the beans have been thoroughly roasted and many people would enjoy this coffee at this stage of development. Second crack is about 10-15 seconds away, so almost all the carmelization has occurred. Any more time added to these beans will begin carbonization, the burning of the sugars within the bean. At that point parts of the bean would begin to burst off, creating "pock marks" on the outsides of the beans. If you like Starbucks (God forbid), their beans- ALL of them- have substantial pock marks or are completely roasted to pieces, literally. Their coffee is so burnt that it is merely coffee shrapnel.
Since I knew whom I was roasting for in this case, I knew the exact level of roast I wanted. My old boss likes darker roasts with a lot of roast quality taste to them. Low acidity (citric acid taste), heavy mouth-feel, and richer chocolate notes are all perfect for her. therefore, I let the coffee roast about a minute longer to 8" total before I began cooling with the colanders.
What was obtained was a nice dark-roasted Latin coffee. After all costs were tabulated, the coffee used cost me about $5 and 45 minutes worth of roasting time. Overall, not too shabby. A larger popper or even a roaster designed for larger batches could do this much faster, and with bulk, even cheaper.
Again from Sweet Maria's, a video discussing the different roast levels may be of further benefit to those of you looking to get into the home-roasting scene:
Lord, thank You for a great hobby. I pray it can turn into more. Keep my head deflated and on straight. Here we go.
related posts:
Basic Training Part 1
Basic Training Part 2
Roasting @ the Roaster


No comments:
Post a Comment